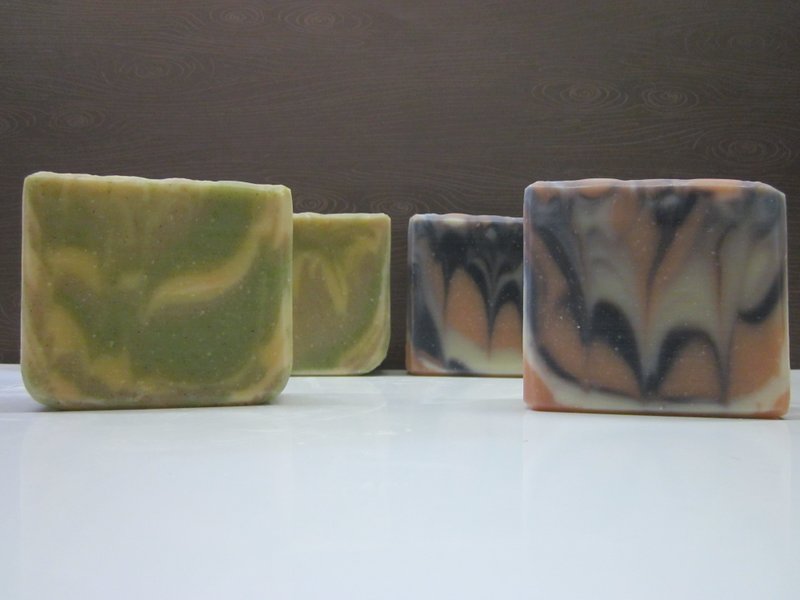
Showing posts with label infused. Show all posts

Thursday, June 12, 2014

Part 2, Natural Dyeing Series - Marigolds & Calendula

So, sorry to those (few) folks who subscribe to my blog wanting to see/learn about my soap making adventure’s only to be recently mislead into some of my other interests…the most recent being Naturally Dyeing.  In a way it is a related to my soaping since all of my soaps are colored naturally.  I’m an avid knitter so of course my curiosity with natural dyes in soaping would spring up in my love for wool too.  I’m usually thinking,’ what would that look like in soap?’, but now I’m always wondering what wool would look like dyed too.  It is sometimes hard to drive down the road…I’m looking at all the weeds and plants on the roadside and wondering what would they look like in the dye pot.  So onto my little Natural Dye Series, Part 2 – Marigolds and Calendula.

I grouped Marigolds and Calendula together for none other than the latter is referred to as ‘Pot Marigold’.  They look and smell a bit similar too. 

Marigolds are native to North America.  The Aztecs used them in religious ceremonies.  They are used all over the world in festivals and ceremonies for dyes, food and floral arrangements.  They are so easy to grow and once established will flower well into Autumn.  If you save the dead seed pods and dry them you have seeds ready to go next Spring.  I have my kids help plant Marigolds all over the perennial flower beds in our yard for bright touches of color.  I love them and have to admit they are one of my favorites.  I think it is because they are so easy to grow, flower constantly and provide you with seeds for the next year.

Calendula is not botanically related to marigolds, but look similar.  Calendula is native to the Mediterranean area and like Marigolds is used throughout the world for their pretty bright flowers, but Calendulas are also used medicinally to treat wounds and skin irritations.  I started my Calendula plant from a package of seeds that I got at my local farm fleet store.  I harvest the fully matured bright yellow flowers and dry them on an old window screen.  I let a few flowers go to seed and once dried and wilted I dehead and shake the seeds onto the ground.  I tried saving the seeds and planting elsewhere in the garden, but it never took.  I’m on my 3rd season of Calendula from my one packet of seed by doing the above.  I've noticed a few new plants further away from the original so maybe the wind carries some seeds. 

Calendula has many uses, but is mostly used for skin care since it promotes healing and is extremely gentle.  You will find it used in many salves and balms especially for babies chapped or irritated skin.  I use my dried petals in soap since the bright yellow color remains through the saponification process.  I've also infused my oil with dried petals for an extra skin soothing bar of soap.


I only use my dried Calendula petals in soap and salve and Marigolds as natural dyes for animal or plant fibers for sewing or knitting.  Onto some pictures........

Naturally Dyeing with Marigolds:

Cotton Muslin fabric pre-mordant with Alum ready for dye

I used dried Marigold seed pods left over from our Spring planting (approx 4 oz).  The fabric and seed pods are layered into the jar and then I poured hot water over to fill.  This sat on the counter for a few days.


The same cotton muslin out of the dye.

 And the finished product.  I'm impressed with the bright yellow golden color.


I saved the seed pod mixture and decided to try dyeing some yarn with it also.  Here are the natural skeins.  I basically went through my stash and whatever looked natural and plain went into the dye pot.  I did not pre- mordant with anything.  I didn't even scour or pre-soak them.  All are plant or animal fibers (alpaca, merino or cotton)
 

Out of the pot...still a nice golden yellow color with the 2nd exhaust.

I dyed these in the same dye pot...they were a pale natural cotton color before sitting in the dye pot for a few days.  Again no pre-mordant.

I decided to play around with an Iron post-mordant.  Here is my iron mordant...it is some metal hardware the kids found in the yard digging around that I put in an old pb jar with vinegar and water.  It sat for about 2 weeks until it was all nice and orangy dark.  


 I took a risk and added half of one of the Marigold skeins directly into the iron mordant.  I think next time I would fill a basin with water and add some of the mordant to the water....not the fiber directly in.  It may weaken the fiber...maybe, who knows.  I didn't have a timer but I read you could leave it from anywhere from 5-20 minutes depending on what color you want to achieve.  A post-iron mordant is known to 'sadden' the color...make it darken and more intense.  I had the radio on and left it in for two songs...so about 10 minutes.  


And here it is after a rinse. 

and what I knit with the yarn.....Enchanted Mesa sweater by Stephen West


 Naturally Dyeing with Calendula:


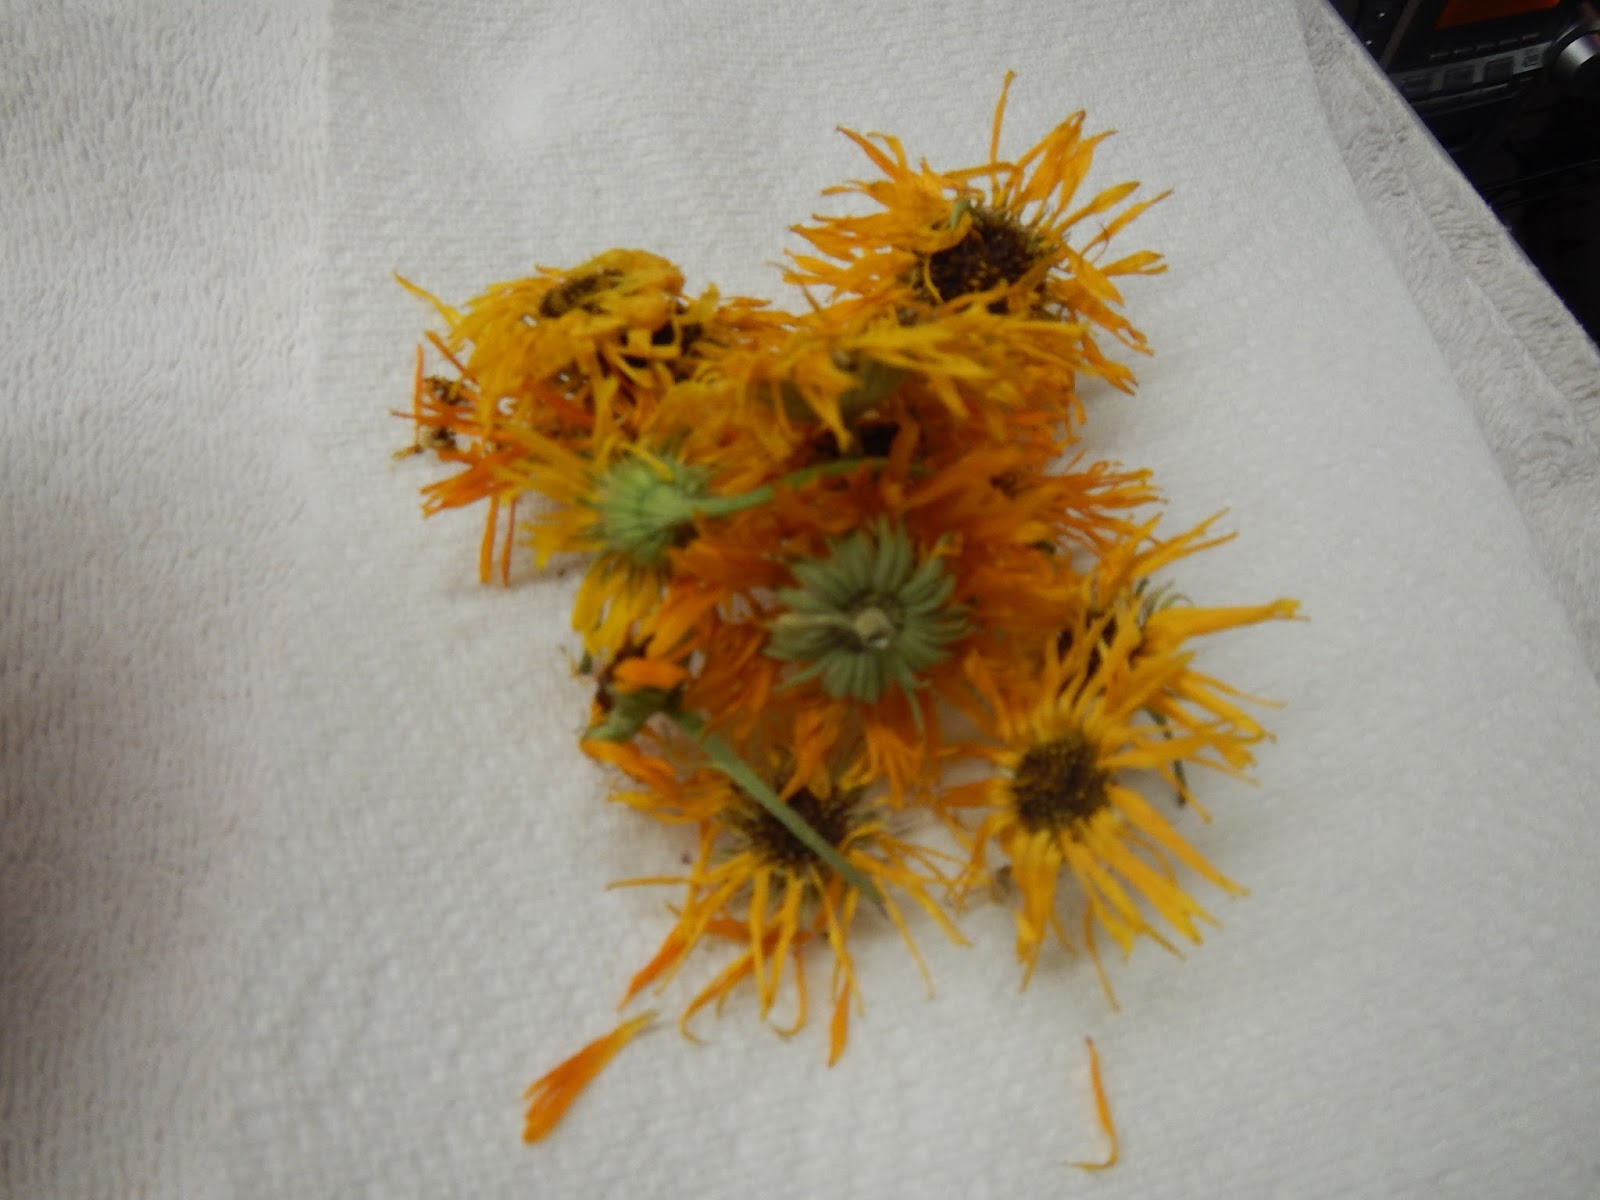
Some dried flower heads


I infused some oil with the dried flowers for a few weeks.  I picked off the yellow petals, placed in a sterile jar and topped with oil.  (I think I used Sunflower Oil, but it may have been Olive).  You can see how brightly colored the oil gets after a few weeks.

 I used that bright oil to superfat a batch of soap and added some petals as decoration to the top. 

Up next in our Natrual Dye series.....TEA!

Wednesday, May 21, 2014

Natural Dyeing Series, Part 1 - Alkanet Root

I dye all of my soaps naturally and I'm always interested in learning more about what to use.  I thought it would be interesting to make a series of posts highlighting some dye I use or things I learn through my research.  There are so many resources out there to find out information, but the best way for me has been simple experiments.  I turn to Google at lot to see if someone else has any info to share about a different herb.  I have also checked out at my local library these books:  Dye Plants and Dyeing, by John & Margaret Cannon and The Handbook of Natural Plant Dyes, by Sasha Duerr.  The latter has amazing pictures and is an excellent source for all kinds of things found in nature.  Both give detailed descriptions about the dyeing process that is used for animal fibers or fabric.  I sometimes think what some of the stuff found in nature would look like in soap...most may end up being brown when it hits the lye, but it is fun to think about and maybe experiment with.

I chose Alkanet Root as my first herb to feature in the series since it is so versatile and I use it frequently.   It is in the Borage family has been a source for red dye for centuries and is considered non-toxic.  I use it in powder form since I mainly use it for soap so it can be a bit messy.  I've used it as a natural tint in Lip Balm and to naturally dye wool.


I'll start with the soap first.  I've done both methods -- adding directly to the lightly traced soap and making an oil infusion with the powder prior to making a batch.  I have to admit both give similar results so I tend to just add it directly into the soap pot.  It makes a nice grey/purple color.  The soap in the above photo is my 'Queen of the Galaxy' which contains both Alkanet Root and Moroccan Red Clay -- a nice contrast in an all purpose naturally dyed soap.  My use rate is about 2 tbls to about 15 oz of raw lightly traced soap. 

In Lip Balm, I infused my Olive Oil with some Alkanet Root Powder for a few days stirring it each morning. The infusion is super simple and makes a nice naturally dyed lip balm.  It leaves a faint touch of color which is just perfect for me since I don't usually wear much makeup.  My use rate is about 2 tsp to 2 oz of oil.  My lip balm contains:  Olive Oil infused with Alkanet Root powder, Coconut Oil, Beeswax, Vitamin E Oil & Natural Peppermint Oil.

It was a total experiment when it came time to dye the wool.  I found some interesting articles on the internet to read, but most people dye with the actual root and not the powder, but since I have powder it made it a tiny bit tricky.  I found this incredible post which was invaluable.  Alkanet Root isn't soluble in water so in order to dye wool you must make a dye solution in either vodka or rubbing alcohol.  My dye solution was about 5 tbls to about 1 cup of rubbing alcohol and I let it soak for 3 days.  I had to stir it a few times each day since the powder settled to the bottom and seemed to get a bit clumpy.  Alkanet Root should be used at a rate of 75-100% WOF (weight of fiber).  I think I should have used a bit more alkanet since I ultimately dyed 11oz of wool.  I didn't weigh my 5 tbls prior to starting.  You must pre-mordant your fiber prior to dyeing so the color will adhere to your wool.  Mordant for Alkanet should be:  Alum 12-20% WOF + CoT (Cream of Tartar) 5-6%.  I used 1.3oz of Alum (which wasn't enough, but I didn't want to run to the store) and .5oz of CoT for my 11oz of wool.  To actually dye the wool I had to strain my rubbing alcohol solution since you don't want the powder in your dye bath.  That was uhh...a MESS!  I used coffee filters and paper towels, but it still found it's way onto every surface in my kitchen.  Make sure you are working in an area you can get messy or clean quickly.  I put a large pot of water on the stove and brought it to a simmer, added my dye solution, mixed it well then added my mordant wool.  I let it simmer, never boiling!  for about an hour and then turned the heat off and let it cool until I could remove the yarn and give it a bath.  I think it turned out well.  The yarn is reclaimed from a 100% wool Limited sweater.

BEFORE

AFTER

I wound my yarn into a ball to knit with and my hands turned a bit purple.  I ended up soaking all the skeins in a warm vinegar bath for about an hour and all is well!  Ready to knit sans purple hands. 


Up next in our Natural Dyeing Series is Marigold & Calendula Flowers.  


Friday, October 4, 2013

the makings of some 'Winter Salve'

I've been making salve for personal use for a while now.  I don't ever plan to sell it...I adore it to much to ever give up an ounce.  I'm planning a new batch and thought I'd share.  This will be perfect in the Winter for dry, stressed and irritated skin.

Here is what I put in....the dried 'stuff' is from my garden (except for the Eucalyptus, which comes from my parent's)  + Comfrey Root and Slippery Elm from Mountain Rose herbs.

I don't usually measure anything...I can't really be that scientific with my salve, but I simply added (eyeballed) equal amounts of Lemon Balm, Eucalyptus, Chamomile, Calendula, Comfrey Root and Slippery Elm (both from Mountain Rose herbs) + previously infused Rosemary infused Olive oil.

Here it is before adding the oil

and with the Olive Oil

I'll let it sit on the counter for weeks, strain and add some melted beeswax  + some ground Nettle Powder and some Essential Oils (probably Lavender & Tea Tree) to finish off the salve.  Put into sterile jars and enjoy all winter long!  I can't wait....

Monday, September 9, 2013

and now the SNAPS

In my previous post I mentioned that I would post the pictures of the soap I recently made....so here are the snaps.  Enjoy!

In the molds....


Sunday, September 8, 2013

The makings of some SoAp

I was having such a blast last night making some new soap I thought I'd write up a blog post about it AND I actually remembered to grab my camera.  I thought I'd try something a bit different and do a master batch of oils with each batch having their own lye solution made.  I have four wooden molds.  Three of my molds I like to use a 44oz oil recipe and the other I use a 40oz oil recipe, but I was going to superfat that one soap with some Calendula (from my garden) infused oil so I only calculated 35oz for that one.  I had a huge pot of oils all mixed and ready to go and then I separately measured out on the scale enough for each batch.  I thought it would save me some time and happy to report it did!  I just had to spend a bit of time figuring out each batch beforehand and prepping the other additions.  I grabbed my camera to document my evening adventure.  The four batches I made are...Calendula, Chocolate Mint & Cinnamon, Almond Milk & Oatmeal, and a scented batch of Ombre Charcoal.  Here are some pics.... 

The molds all wrapped and ready to go


Chocolate Mint herb from my garden which I dried and then put in my spice grinder 


Here it is ground to a fine powder


The Sunflower Calendula infused oil which was infusing for weeks in the Mason jar


The lovely orange color of the infused oil


Some dried flowers to decorate the top of the batch


I tend to use my washer and dryer as additional space while soaping.  Here are the other additions I needed.... to make the Ombre Charcoal I used Bamboo Activated Charcoal Powder & Lavender & Tea Tree Essential Oils.  The Almond Milk & Oatmeal ready for soaping ( I always use the 50/50 lye/milk method for my milk soaps) and some cinnamon and cocoa powder for the Mint & Cinnamon soap.  I ended up not using any cocoa powder.

And an in process shot of the Ombre Charcoal.  If you look closely you can see the tape I used as my 'precise' measurement for the gradient layers.  I started with the darkest layer of soap on the bottom, used half of the container, filled it with uncolored plain soap to lightened it a bit, filled half of this into the mold then repeated the process for the additional layers with each getting slightly lighter in color until I ran out of soap.  I think I got 5 or 6 layers.  It was a SLOW tracing mix so it was a bit time consuming since each layer had to harden slightly so I wouldn't lose the effect.  I ended up shaving other soaps and doing lots of clean up while waiting between each layer.  This one took a while!


That is it!  I'll post soon with some snaps of the cut bars.   Happy soaping!!


Tuesday, April 2, 2013

Oh shame on me...

I have neglected you blog!  I'm sorry please don't take it personally, I've been super busy!!!

I recently had TWO patterns on Ravelry's 'HOT RIGHT NOW' tab...yep, two!  I was freakin out with excitement....(perhaps you have to be a knitter to totally understand the joy).  I attached a snap of the screen shot just to prove it...not that I was thinking you had any doubts.

I was #5 and #8...out of 250,564!!!  


AND...I've been making SOAP!

I had two orders for Baby Showers and have been putting the finishing touches on the batches, labels, etc and making a bunch of other batches.....pictures always tell a better story than me trying to describe them...plus who doesn't like pictures of soap???

 Rose Clay & Charcoal (updated version)


Green Tea & Nettle (on left) Alkanet Root infused oil & Rose Clay (on right)


 Green Tea & Nettle 


Close up of Alkanet Root infused soap embedded in Nettle before the last pour

And the finished soap.... used alkanet root infused oil embeds in Nettle..yellow is turmeric infused oil
 

Soap patiently curing.....4-6 weeks 

I love all of the colors...all natural, nothing artificial, synthetic, dyes or otherwise harmful in anyway.  I think most of the colorants I used you could probably eat!  Most..not all, but please don't munch on the soap. 


Friday, March 8, 2013

Dusty Tree Soap

Finally a batch of.....Dusty Tree Soap.

I didn't really plan on creating a signature soap for my brand, it just sort of happened.  I mixed this latest batch after much time!!! number crunching on a calculator.  I thought it was going to be a bit different, but I knew on the first cut that THIS is the soap I've always wanted to be called Dusty Tree Soap.  It is the colors really.  I have a mild obsession with green and orange.  LOVE IT!  

I used Nettle Powder for the green shade (both infused for weeks in oil and a bit of the actual powder added at trace) for a nice deep green color.  

Dusty Tree Soap

 2013 Soaps


Sunday, February 3, 2013

Natural Colorants in Soap -- and a CONTEST!

It was a bit hectic and I'm not sure I'd recommend it or even attempt it again, but I made four batches of soap at once.  My husband was kind enough to watch the kids while I worked in the kitchen.  I thought it would be about the same amount of time as one batch, but no ...much longer! (duh, of course it was...what was I thinking?)  It was worth it since I was doing embeds and not exactly sure how much soap mixture I needed per mold (because of the size of embeds) so I was able to use the extra mixture from three batches to make a fourth.  I simply swirled the left over paprika infused soap, indigo infused soap and sea kelp together.

 Here are the four bars waiting patiently to be cut.  


And here they are cut.......


Red Wine & Chocolate at Sunset

(the brown balls are made with red wine, I coated them in cocoa powder and embedded 
these balls in a paprika infused soap base)


Tomato & Sea Kelp --


Misbehaving Stripes

(made with tomato soap embedded in naturally colored  Indigo soap base)


'The yet to be named soap'

(a mixture of Sea Kelp, Paprika infused & Indigo Soap -- swirled)


As a matter of fact, I think I may do a little contest.  Leave a comment under this blog post for your chance to win a small gift from me.  Please tell me what you think I should name the above soap ('The yet to be named soap')....do this by February 24, 2013.  I will use a random number generator to chose the lucky winner for the small gift and will then read all of the comments and pick my favorite for the name of the soap.   Also please include your contact information so I can email the lucky winner.  Thanks and GOOD LUCK!!!

(one entry per person please!)

Tuesday, January 22, 2013

Shaken not Stirred...

I've been thinking and experimenting with the hopes of getting a reddish color naturally in soap.  It has been my quest for a few days and wahwahwah....not a chance with what I've tried or how I tried it.

First was just a total jump right in approach with boiling some red wine to remove the alcohol and then freezing it to eliminate the volcano effect.  I mixed the red wine ice cubes with the lye with no extra water.  It smelled horrible and turned a dark maroon brown color....looked kind of yuck.  I swirled this raw soap mixture in the mold with another batch colored with Rose Clay...calling it Wine & Roses Soap.  The red wine soap turned brown after a gel.  Days after being cut it still looks the same...no color change.  Still a brown.  It isn't an ugly brown color, just brown.  No smell remains...purely unscented.

Wine & Roses Soap


After this batch, achieving a red color was still on my mind.  I wanted to try two more approaches.  The second was still red wine, but I was going to add it to the batch by the 50/50 method.  And my third attempt was to use tomato paste.  I added the paste after a light trace directly to the batch.  

Here is a picture of the soap in the mold...the large one is the tomato paste and the smaller one being red wine.


And here they are after a gel and unmolded 24 hours later.  The red wine is still brown but not as dark as attempt number one (with it being ice cubes) and the tomato paste is a nice pale orange color.


I decided to make soap balls with the red wine 50/50 soap (second attempt) and have some soybean oil infusing with paprika for a bright orange base to toss the light brown balls into.  I'll shake the soybean oil everyday for about a week to get a nice dark color.

Here is the making of the red wine soap balls....totally reminds me of peanut butter balls at Christmas time.  As a matter of fact the 50/50 red wine soap looks about the same in color to a batch of peanut butter balls.