Showing posts with label knitting. Show all posts

Wednesday, September 23, 2015

new design in the works....

Something new I'm working on -
aptly named Summer's End Mitts
as today marks the First day of Autumn 2015
what a favorite of mine -
the mitts and the season! 


these are knit using some reclaimed wool -
which is absolutely wonderful stuff -
I wish I knew what it was - it is the real deal
a bit scratchy + love the feel of the lanolin!
They may just be dunked in the 
dye bath once complete.

Tuesday, September 22, 2015

Silvia Shawl - Cast On TUTORIAL

I thought I'd put together a little tutorial on how to
get started on this shawl.  It is by no means difficult,
just something a bit different.  
What this cast on does is create an I-cord 
border.  I like the look of a finished
edge since most of the shawl is done in garter stitch.

You will need the pattern to follow along - 
which is available on Ravelry

or here

Let's get started:


don't stress about your work looking very loose - 
the tension evens out when you have more
of the pattern completed.


hard to see my live stitches - but I have 3 there!


yes, I did not use any stitch markers!


Silvia Shawl Fingering weight
sample knit using 
Quince & Co, Finch 2 skeins - Aleutian colorway

Tutorial completed with 
Brown Sheep, Nature Spun Worsted - Eucalyptus colorway 


Thursday, July 30, 2015

for those of you who are knitterly inclined....

I have a new design in the pipeline and am looking for testers.  You can find my posting on Ravelry here if you are interested.  It knits up pretty quickly and is quite mindless and easy for a good Summer knit.


Here are the details:

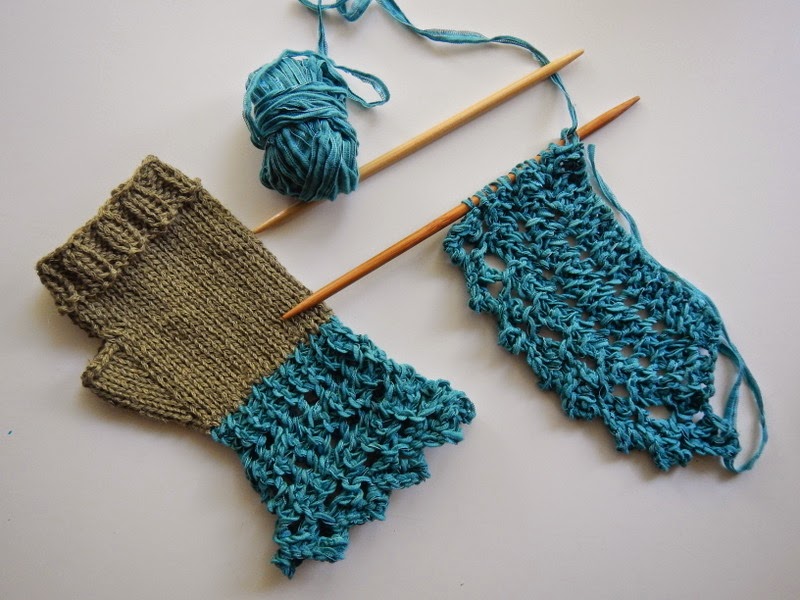
Knit sideways & slightly asymmetrical in shape incorporating I-cord, a cable motif running along one edge and simple yarn over lace.
Deadline: August 24, 2015
Level: This is a good pattern for an adventurous beginner and experienced knitters alike, since it is simple enough but contains some basic cables to keep things interesting.
Samples knit with: 
Fingering Weight Version: 
Quince & Co Finch (100% American Wool; 
221 yards/50g): Aleutian 148 colorway 2 skeins. 
442 yards total 
Finished Dimensions: 56” x 22”
Sport Weight Version: 
Cosymakes Snapdragon (100% Wool; 415 yards/ 
113g): Pink colorway 1 skein. 415 yards total 
Finished Dimensins: approx 59” x 30”
Materials: 
YARN: Fingering Weight Version: 
approx 450 yards, exact yardage may vary depending on final size
Sport Weight Version: 
approx 420 yards, exact yardage may vary depending on final size
NEEDLES: 
Fingering Weight Version: 
US#7 (4.5mm) 24” circular and double pointed needles (dpn)
Sport Weight Version: 
US#9 (5.5mm) 24” circular and double pointed needles (dpn)
NOTIONS: waste yarn; stitch markers; cable needle; darning needle
GAUGE: fingering weight: 20 sts and 32 rows = 4 inches 
in garter st 
sport weight: 22 sts and 33 rows = 4 inches
Expectations: 
Create a project page (list yarn and needle size), add at least one WIP photo, provide detailed feedback to me and report any errors, request help if needed, finish by deadline and post completed pictures and dimensions to your project page.
Interested?: Please get me your email address and let me know a bit about yourself. Let me know which yarn weight version you are interested in knitting (fingering or sport). 
I appreciate your help with my newest design.


Thursday, February 26, 2015

Sharing....

Someday I'll write this up as a shawl pattern....the WIP


And the finished project - yet to be named, yet to be written into a pattern.  
But another is on the needles....just working out the kinks. 
Maybe it'll be called 'My Mind's Thoughts'


Another pattern awaiting to be put to paper.....


Simple to knit, but very stunning!


Cannot decide if I should frog (as in rip this out).  It has been sitting for 2 years and I finally tried it on again last week.....decisions, decisions?  It is Mon Petit Gilet Raye by Isabelle Milleret.  (My Little Striped Vest) 


and my latest WIP...Quince & Co, Nori Cardigan out of reclaimed yarn.


Thanks for stopping by....


Wednesday, February 11, 2015

Mint into the Dye Pot

I harvested a bunch ( I mean a bunch!) of spearmint, peppermint and chocolate mint from my garden this past summer and dried it.  I put all of the dried bunches together in a large box.  I didn't keep the varieties separate.  I got tired of moving the box around so I decided to squeeze the dried bunches with my hands to remove the dried leaves.  I filled a large freezer bag with dried mint leaves and still had some left so I pulled out my spice grinder and whizzed a bit to a fine powder to use in my soaps.

I got out my garden shearers and cut the dried stems up a bit and tossed whatever remained in the box + a few handfuls of some dried leaves into my dye pot added some water and let it simmer.


While the mint was simmering, I scoured a skein of Skacel Merino Lace - a discontinued yarn that I found at my LYS.  It was a bare skein of superwash wool.  After scouring it smelled kind of like bleach.


 Not sure if they actually bleached the fibers to get it white or if that stench is from the superwashing process.  From what I understand they coat the wool fibers with plastic so the barbs on each strand will not felt when agitated.....nasty!  I'm not a fan of superwash, but it was at my LYS, bare, within my price range and I had a gift certificate.  

This skein is 100g so that means I needed about 2tsp of Alum and the same of CoT for mordant.

Once the skein was cooled in the mordant bath I added my liquid mint dye.


This simmered for about an hour.  I pulled it out and it was somewhat of a tan bland color so I added 2 tsp of baking soda to the dye bath and mixed it around to dissolve.  This immediately changed the color of the dye to a darker color.  I made sure everything was dissolved and I put the skein back in.  The baking soda changes the ph of the dye - hence changes the color.  I let it simmer for a bit longer, turned off the heat and let it sit overnight.  The result is very pleasing.  


Reading online and in books, I see most people mention that mint dyes a green color so I'm happy with my result.  I'm planning to knit a cropped 3/4 length sleeve cardi with the mint dyed yarn and add a lace button band in grey....should be perfect for Spring.  Love the Grellow color combo.

Monday, November 17, 2014

Indie Knit & Spin 2014 -- THANK YOU!!


This past weekend was the Indie Knit & Spin.  It is always such a delight to attend this event.  Thank you so much to all of my friends and family who supported me through this and for all the familiar faces and new friends I met along the way.  It really is so amazing to see the talented fiber friends and their latest creations worn during the day and to see all the amazing products each vendor brings.  I didn't take as many pictures as I expected (I guess I was busy) and look forward to using all of the things I purchased.  I bought a lovely skein of fingering weight yarn from Wren House Yarns.  It is a silk and merino blend.  I cannot wait to cast this on the needles.  I’m thinking something extra squishy with lots of garter stitch.  I also got some fiber to once again figure out how to spin.  I really really want to learn.  I tried for a tiny bit last year, but am determined to give it another go this year.  Maybe the really pretty fluff will keep me inspired.  I got dyed Falkland and Shetland and some undyed Tarhgee.  As the saying goes, watch this space……


Friday, August 29, 2014

a Quickie


My Table at Ligonier Country Market


Can't wait to get these into the dye pot with some wool


Dried Mint harvested from the garden earlier this year

some herbs just hanging out to dry


Friday, March 21, 2014

Friday, October 11, 2013

Messing around with some yarn

My Husband's Aunt was shopping at an Estate Sale when she spotted a large box of vintage wool.  She bought it for me which is so kind and sweet of her.  In it contained enough yarn to knit multiple sweaters...in fact I've already knit two and haven't even put a dent in it.  I thought I'd experiment with dyeing some of the wool with some food coloring since I didn't want six of the same color sweaters.  I have no experience in this and sort of just jumped right in.  I watched one 7 minute video on youtube which was helpful.  Here are a few shots of what I did and how the wool color turned out.  I only did a little bit to try on a hat or mittens, but I think it turned out great!

This is the before shot...I used Wilton Icing paste in the brown color.  I previously soaked my wool in a vinegar bath for about an hour and squeezed out as much water as I could.  I set it aside and then I added the dye to a pot of vinegar water.  I didn't measure, but if I had to guess I probably used 4 cups of water and 2-3 tablespoons of vinegar.  I then put the wool into the pot and turned the heat to simmer.  I let it sit in the warm bath until the water was clear.  This took about an hour.  I slowly pulled it out so I didn't burn myself or agitate the wool and really didn't like to color.  It was still pink just a bit darker, like a dusty rose shade.  So I pulled out more of my food colors.

Here's the wool in the brown Wilton bath.

These are the additional colors I used.  After pulling the wool out and setting it aside I added about 12 drops of blue and about 4 of yellow.  I swirled it to mix and returned the wool to the pot.  It remained on simmer for about another hour until the water was clear(ish).  I gently pulled it out and rinsed it in cool water.

And here is my new dyed wool.  I put a piece of the 'before' color on it as a comparison.  It is a brownish rust color...very earthy.  It was super easy and fun to over-dye wool so I'll probably do it again.  It was just time consuming.

and a what I knit


Sunday, September 29, 2013

New SoApS and some yarny goodness fun!

Here are the latest soaps from my previous post.  I always get such a different look on my Chocolate Mint even though I always make it the same.  Each one is different and unique...I guess that is what I like about making soap.  The thrill, the excitement when you cut into a batch.

AND now for the yarny goodness........

I've been experimenting with natural dyeing even after my last posting where I messed up and heated the black bean juice.  I still have to repeat that one and try for a blue!  But this time I used some dried herbs from my garden.  I had Lady's Mantle and Chamomile.  Here are the pics from my adventure.....

I got these huge cones from my local thrift store for $1.00 (not each, but total!)  I have no idea what type of wool it is or where it came from or even how old it is, but I thought it was perfect to use for learning how to natural dye.  I've been measuring off about 1.5oz of wool for each batch.


I wash it with my lanolin soap


Let the wool soak by itself, resist the urge to push it into the water.  Let it soak for at least 30 minutes (I soak much longer)


I used alum to mordant.  I found this in my grocery store.  Add fresh water and your mordant (this case alum) to a pot you no longer care to use for cooking and add your wet freshly washed wool.  I read somewhere online that for 4oz of wool use 1 tbls of alum...so figure out your amount.  Bring gently to a simmer..never boil...you will felt your wool.  Some people use a thermometer, I just simply place my hand on the side of the pot to feel if it is too hot (please don't burn yourself...my hands are my best thermometer...that is how I tell if my lye is too hot too when soaping..the feel test isn't accurate by any means, but do whatever works for you).  This picture shows my mordant wool that has the excess water squeezed from it.


Here are my dried herbs (I never did weigh them or the water so I'm not sure of my ratio)  Dried Chamomile and Lady's Mantle that I chopped roughly with a pair of scissors.  I placed the herbs into the pot and then filled with fresh water until they were covered and simmer like you would tea...the house smelled so good!  This would have probably been a delicious tea to drink.  I simmered for about 40 minutes, turned the heat off and allowed to cool.  


Once cool, I squeezed all of the water out of the herbs and added them to my compost bin.


Here is the tea.


and the yarn in it...again return to a simmer and let it go for about 30-40 minutes, turn off heat and allow to cool.  Rinse until your water runs clear....this took me awhile and I was nervous that I was rinsing all my color out of the yarn.


Here are my latest small skeins...only 1.5 oz each


Up next MARIGOLDS!  I plucked every flower off of my remaining plants and placed in the freezer for a later use.  I put them on cookie sheets until they were frozen and then put them into freezer bags.  I got two bags around 12 oz each.